
VESA mount is a standard system that lets you attach monitors to arms, brackets, and other mounting solutions. Four holes on the back of your monitor. Same spacing every time. This simple standard changes everything about how you set up your workspace. No more fixed stands. No more compromises on positioning. Just clean, flexible mounting that works with almost any screen.
Key Takeaways
- VESA mount is a universal standard created by the Video Electronics Standards Association for mounting displays
- Common patterns are 75x75mm, 100x100mm, 200x200mm, and larger sizes for professional displays
- Most modern monitors have VESA mounting holes on the back; check before you buy any mounting solution
- Weight capacity matters; always choose a mount rated higher than your monitor's actual weight
- VESA adapters solve compatibility issues between different hole patterns
- Proper installation takes just 15-30 minutes with basic tools included in most mounting kits
- Guilds Altura Stand uses VESA mounting to offer flexible display positioning with integrated features
Understanding VESA Mount Basics And History
Let's start with the basics. Why does VESA exist? The answer is simple. Before standardisation, monitor manufacturers did whatever they wanted. One brand put holes here. Another put them there. Different spacing. Different thread sizes. It was a mess.
Then came the Video Electronics Standards Association. They sat down and thought about the problem. What if every monitor had the same mounting hole pattern? What if every hole was the same size and thread? Everything would work together. Universal compatibility. Problem solved.

The first VESA standard appeared in the 1990s. It was revolutionary. Before long, manufacturers realised this was better for everyone. Customers could pick any mount. Manufacturers sold more monitors. Competition improved. Prices dropped. Everyone benefited.
Today, VESA is the global standard. It is not just American or European. It is everywhere. Your monitor almost certainly has VESA holes. This is one of those invisible standards that work so well, nobody notices it exists.
Why should you care? Because it means choice. You are not locked into one brand's mounting solution. You can upgrade your monitor and keep your arm. You can switch between wall mounting and desk mounting. You can add USB hubs, RGB lights, and storage (like our Guilds Altura Stand) without worrying about compatibility. That freedom matters.
VESA Mount Patterns And Measurements Explained
Understanding VESA patterns is key to choosing the right mounting solution. Let's break this down into simple pieces.

Common VESA mount sizes and specifications
VESA patterns are just measurements. Four holes arranged in a square or rectangle. The distance between holes is the pattern name.
Here are the patterns you will actually encounter:
- 75x75mm - Small monitors, usually 17-24 inches. This is the entry-level standard. Most office displays use this.
- 100x100mm - Medium monitors, typically 24-32 inches. This is the most common pattern you will see today. Gaming monitors often use this. Work monitors too.
- 200x200mm - Large displays, usually 32 inches and up. Professional monitors sometimes use this. Specialty displays often do.
- 200x100mm - Ultrawide monitors. The measurement is rectangular instead of square.
- 400x400mm - Very large professional displays. Rare for home use. Common in studios and control rooms.
Which one does your monitor use? Most 27-inch displays are 100x100mm. Most 24-inch displays are 75x75mm. Check your manual or the manufacturer's website to be sure.
How to measure VESA mount patterns
You do not need to guess. You can measure. Flip your monitor around. Look at the back. You will see four holes arranged neatly.
Get a ruler or measuring tape. Measure from the centre of one hole to the centre of the hole directly across (not diagonal). Write down the distance. Now do the same for the other direction. You now have two measurements. If they are the same, you have a square pattern (75x75, 100x100, etc.). If they are different, you have a rectangular pattern (like 200x100).
Common mistakes? Measuring from the edge instead of the centre. Measuring diagonally. Using the wrong holes (some monitors have extra threaded holes for proprietary stands). Take your time. Get it right.
VESA mount weight ratings and load capacity

Here is something critical. Not all VESA mounts are created equal. A VESA 100x100 mount for a 5kg monitor is not the same as a VESA 100x100 mount for a 15kg monitor.
Weight capacity matters. A lot. Each mounting solution has a maximum weight it can safely support. You need to know your monitor's weight. This is in your manual or on the manufacturer's website.
Here is the golden rule: always pick a mount rated higher than your monitor's actual weight. Never pick a mount rated for exactly your monitor's weight. Why? Because gas springs lose pressure over time. Springs weaken. Metal fatigues. You need headroom.
If your monitor weighs 6kg, pick a mount rated for 8kg or 10kg. Not 6kg. Not 7kg. Go higher. Your monitor will stay put. It will not sag. It will not drift down after a few months.
Different mounting solutions have different capacities. A basic arm might handle 4kg. A heavy-duty arm might handle 12kg. Wall mounts vary widely. Check the specification sheet before you buy anything.
Types Of Displays That Use VESA Mount
VESA is not just for computer monitors. It is everywhere.
Computer monitors and VESA compatibility

Almost every computer monitor made in the last 15 years has VESA mounting holes. Curved gaming monitors? Usually VESA. Professional displays? Yes. Budget screens? Yes.
The only exceptions are really old monitors (before 2010 or so) and some ultra-curved gaming displays with unusual designs. Even then, adapters often exist.
Gaming monitors especially benefit from VESA mounting. You can position a curved ultrawide display perfectly for immersive gameplay. The flexibility matters when you want to see every detail.
Professional displays for photography, video editing, and design all use VESA. This makes sense. These professionals need precise positioning. They need to move monitors between different mounting solutions.
TV and large display VESA mounting

TVs use VESA mounting too. It is slightly different from monitors, though. TV VESA patterns tend to be larger. A 55-inch TV might use 400x400mm. A monitor of similar size might use 200x200mm.
This matters if you want to mount a TV on a monitor arm. You cannot use a small monitor arm for a large TV. The weight is too much. The mounting pattern is wrong. You need a heavy-duty TV arm. These exist, but they are specialty items.
Large format displays used in digital signage, control rooms, and public information systems all use VESA. It is the global standard for a reason. It just works.
Speciality displays and VESA mount variations

Touch screen displays use VESA. Medical displays in hospitals use VESA. Industrial monitors in factories use VESA. Outdoor displays use VESA.
Some speciality displays have variations. Medical monitors might have extra mounting points for equipment. Industrial displays might use reinforced VESA patterns. Touch screens might have additional screws to secure sensors. But the basic VESA standard still applies.
This universal standard is actually remarkable. One simple idea. Four holes. Same spacing everywhere. It connects a gaming monitor to a TV arm. It connects a medical display to a wall bracket. It connects an outdoor screen to a weatherproof pole mount. Everything speaks the same language.
VESA Mount Hardware And Accessories
The mounting holes are just the beginning. You also need the right hardware to make it all work.

VESA mounting screws and fasteners
VESA holes use specific screw sizes. Not random sizes. Standardised sizes.
The common sizes are:
- M4 - Used in most 75x75mm displays. Small and light monitors use these.
- M5 - Less common but sometimes used in compact displays.
- M6 - Found in many 100x100mm displays. This is very common.
- M8 - Used in heavy displays and professional screens. Larger, stronger threads.
The letter M means metric. The number is the diameter in millimetres. M4 is 4mm diameter. M6 is 6mm. Simple.
Screw length matters too. Too short and the screw bottoms out. Too long and you crack your monitor's circuit board. Check your manual for the correct length. Usually 8-10mm is right for most displays.
Material also matters. Stainless steel screws resist corrosion. They last longer. Do not use random screws from your junk drawer. Get the right specification. They are cheap. A few pounds buys a whole kit.
VESA adapters and compatibility solutions
What if your monitor has VESA holes but your mounting solution uses a different pattern? Adapters exist for this problem.
A VESA adapter is a metal plate. Your monitor connects to the adapter. The adapter connects to your mounting solution. They bridge the gap between different patterns.
Example: your monitor is VESA 75x75mm but your arm expects 100x100mm. An adapter plate lets you connect them safely. The plate has holes for both patterns. Problem solved.
Universal adapters handle multiple patterns. 75x75 to 100x100. 100x100 to 200x200. Even 75x75 to 200x200 if you need it. These are incredibly useful for compatibility.
Cost is minimal. A quality adapter costs just five to ten pounds. Much cheaper than buying a new arm just because patterns do not match.
VESA mount arms and brackets
Once you have VESA compatibility sorted, you need the actual mount. Options include:
Desk clamp arms attach to your desk edge. Height-adjustable. Swivel. Tilt. Rotate. These are the most popular for home offices and gaming setups. They free up desk space and adjust endlessly.
Wall mount brackets attach directly to your wall. Flat and simple. Great for small spaces. Less adjustable than arms but space-efficient.
Ceiling mounts attach to your ceiling. Unusual but useful in some setups. Control room displays sometimes mount this way.
Pole mounts attach to a vertical pole. Flexible. Can be adjusted up and down. Popular in commercial settings.
All of these connect via VESA. All work with the same standard. This is the beauty of standardisation. One simple interface. Infinite mounting options.
How To Check If Your Monitor Has VESA Mount
Before you invest in any mounting solution, confirm your monitor is compatible. It takes five minutes and eliminates guesswork.
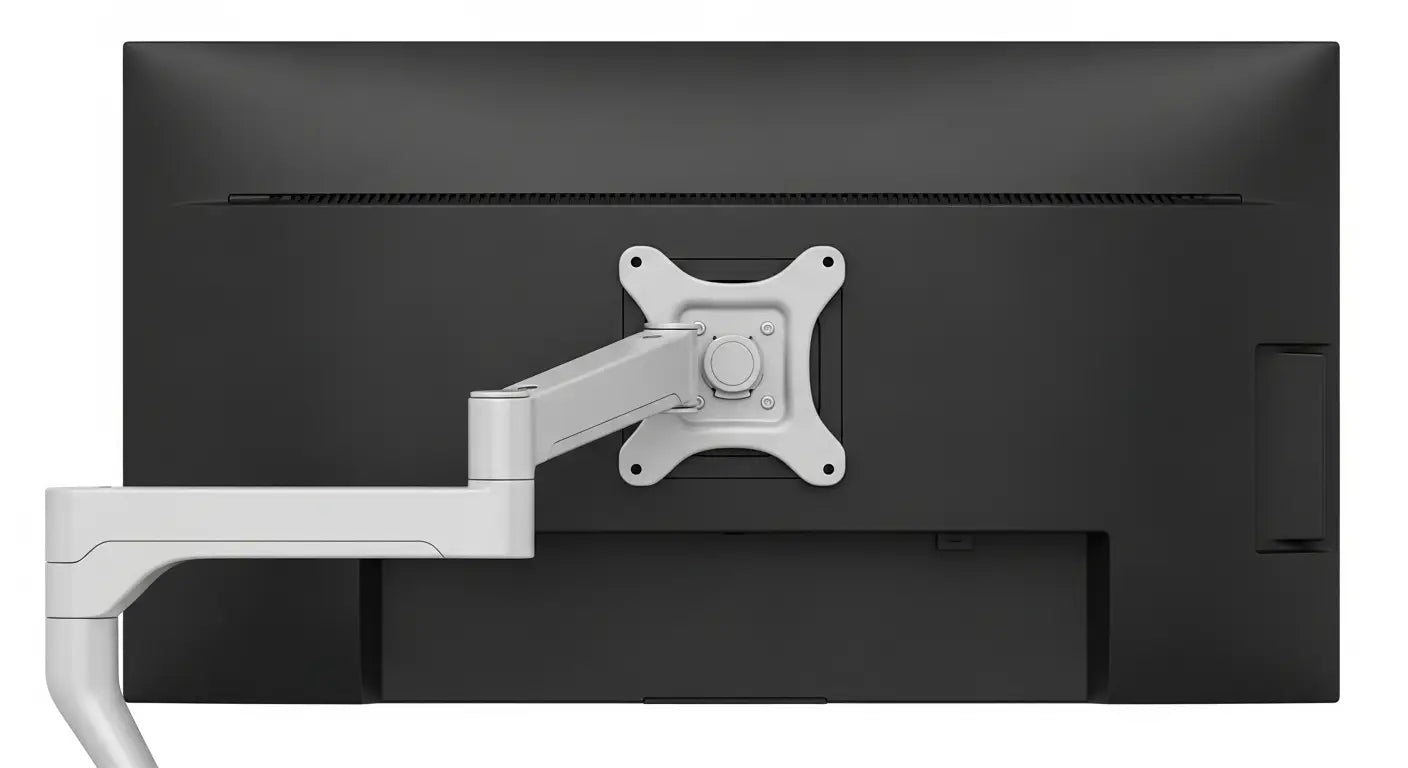
Locating VESA mount holes on your display
Turn off your monitor. Unplug it. Set it face down on a soft surface. The back of your monitor is now facing up.
Look carefully. You will see four holes arranged in a square or rectangle. These are your VESA mounting holes. They are usually located near the top centre or bottom centre of the monitor back panel.
Some monitors have a plastic stand attached to the back. Remove it if you can (usually simple to detach). This reveals the VESA holes underneath.
Do you see four holes? Congratulations. Your monitor is VESA-compatible. Do you see nothing? No holes at all? Your monitor lacks VESA mounting. It is older or has a proprietary mounting system. An adapter might work, but you need research.
Checking manufacturer specifications
You do not need to measure. The manufacturer already did the work. Check your manual. Look for "VESA" in the specifications section. It will say something like "VESA 100x100mm".
If you do not have the manual, check online. Go to the manufacturer's website. Find your monitor model. Download the specifications. VESA information is always listed.
This is the easiest method. No measurement. No guessing. Just read. Five seconds and you have your answer.
Measuring existing VESA mount patterns
If you want absolute certainty, measure. You already know how. Get a ruler. Measure between hole centres. Document the measurements.
75x75mm? 100x100mm? 200x200mm? The number tells you exactly what mounting solutions will work. Write it down. You will need this information when shopping for arms or brackets.
This takes five minutes. It is free. It guarantees accuracy. Do it once and you never guess about compatibility again.
VESA Mount Installation And Setup Guide
Once you have your VESA-compatible display and mounting solution, installation is straightforward. Do it carefully and it takes 15-30 minutes.
Preparing for VESA mount installation
Clear your workspace. Remove everything from your desk. You need room to manoeuvre. Set your monitor face down on a soft cloth or towel. No scratches.
Gather your tools. Most mounting solutions include everything you need. Screws. An Allen wrench. Maybe a small screwdriver. Read the instruction manual first. Do not skip this step. Different mounts have different procedures.
Check the weight capacity one more time. Your monitor weight should be clearly below the maximum. Do not install a heavy monitor on a weak mount. Disaster happens.
Safety first. If someone is working near power lines or at height, take extra care. Turn off and unplug everything electrical. Wait for power banks to discharge. Work in daylight or good artificial light. Mistakes happen in shadows.
Attaching displays to VESA mount systems
Here comes the actual work. Find the VESA mounting plate on your arm or bracket. Usually it is a metal square with four holes arranged exactly like your monitor's holes.
Position the plate against your monitor's back. Make sure the holes line up perfectly. All four holes must align. None of them should be off.
Use the correct screws. Check your manual for length and size. If you are unsure, use shorter screws first. Too-long screws damage electronics. Too-short screws do not grip properly.
Start all four screws by hand before tightening. This prevents cross-threading. Once all four are started, tighten them gradually. Do not crank one screw all the way then move to the next. Tighten a little on each one. Go round and round. Tighten evenly. Even pressure prevents warping.
When all four are tight, test the mount. Move it gently. Nothing should flex or wobble. If something moves, tighten more. When everything is solid, you are done.
Adjusting and positioning mounted displays
Your monitor is now attached. Time to position it perfectly.
For desk arms, mount the arm to your desk first. Follow the clamp instructions carefully. Tighten gradually. You want snug, not crushing.
Once mounted, adjust your monitor to eye level. Sit in your work position. Your eyes should look straight ahead at the top third of the screen. Not down. Not up. Straight.
Adjust height, tilt, and rotation until it feels right. This might take several minutes. Get it exactly where you want it.
Route cables through any cable channels your arm has. This keeps things tidy and prevents accidental disconnection. Use zip ties if needed to bundle excess cable.
Test everything. Adjust the monitor again. Change the angle. Make sure all movements work smoothly. If you are happy, you are finished.
Benefits Of Using VESA Mount Systems
Why go through all this? What do you get in return?
- Better ergonomics. Your screen at the right height. Your neck relaxed. Your eyes not strained. Hours of work without discomfort. This alone is worth it.
- More desk space. That space under your monitor? Now available for keyboard, mouse, papers, coffee. Every centimetre counts in small spaces.
- Flexibility. Change your mind about positioning? Adjust it. Need to move to a different desk? Take your arm with you. Switch between wall and desk mounting? Easy. This flexibility saves money and time.
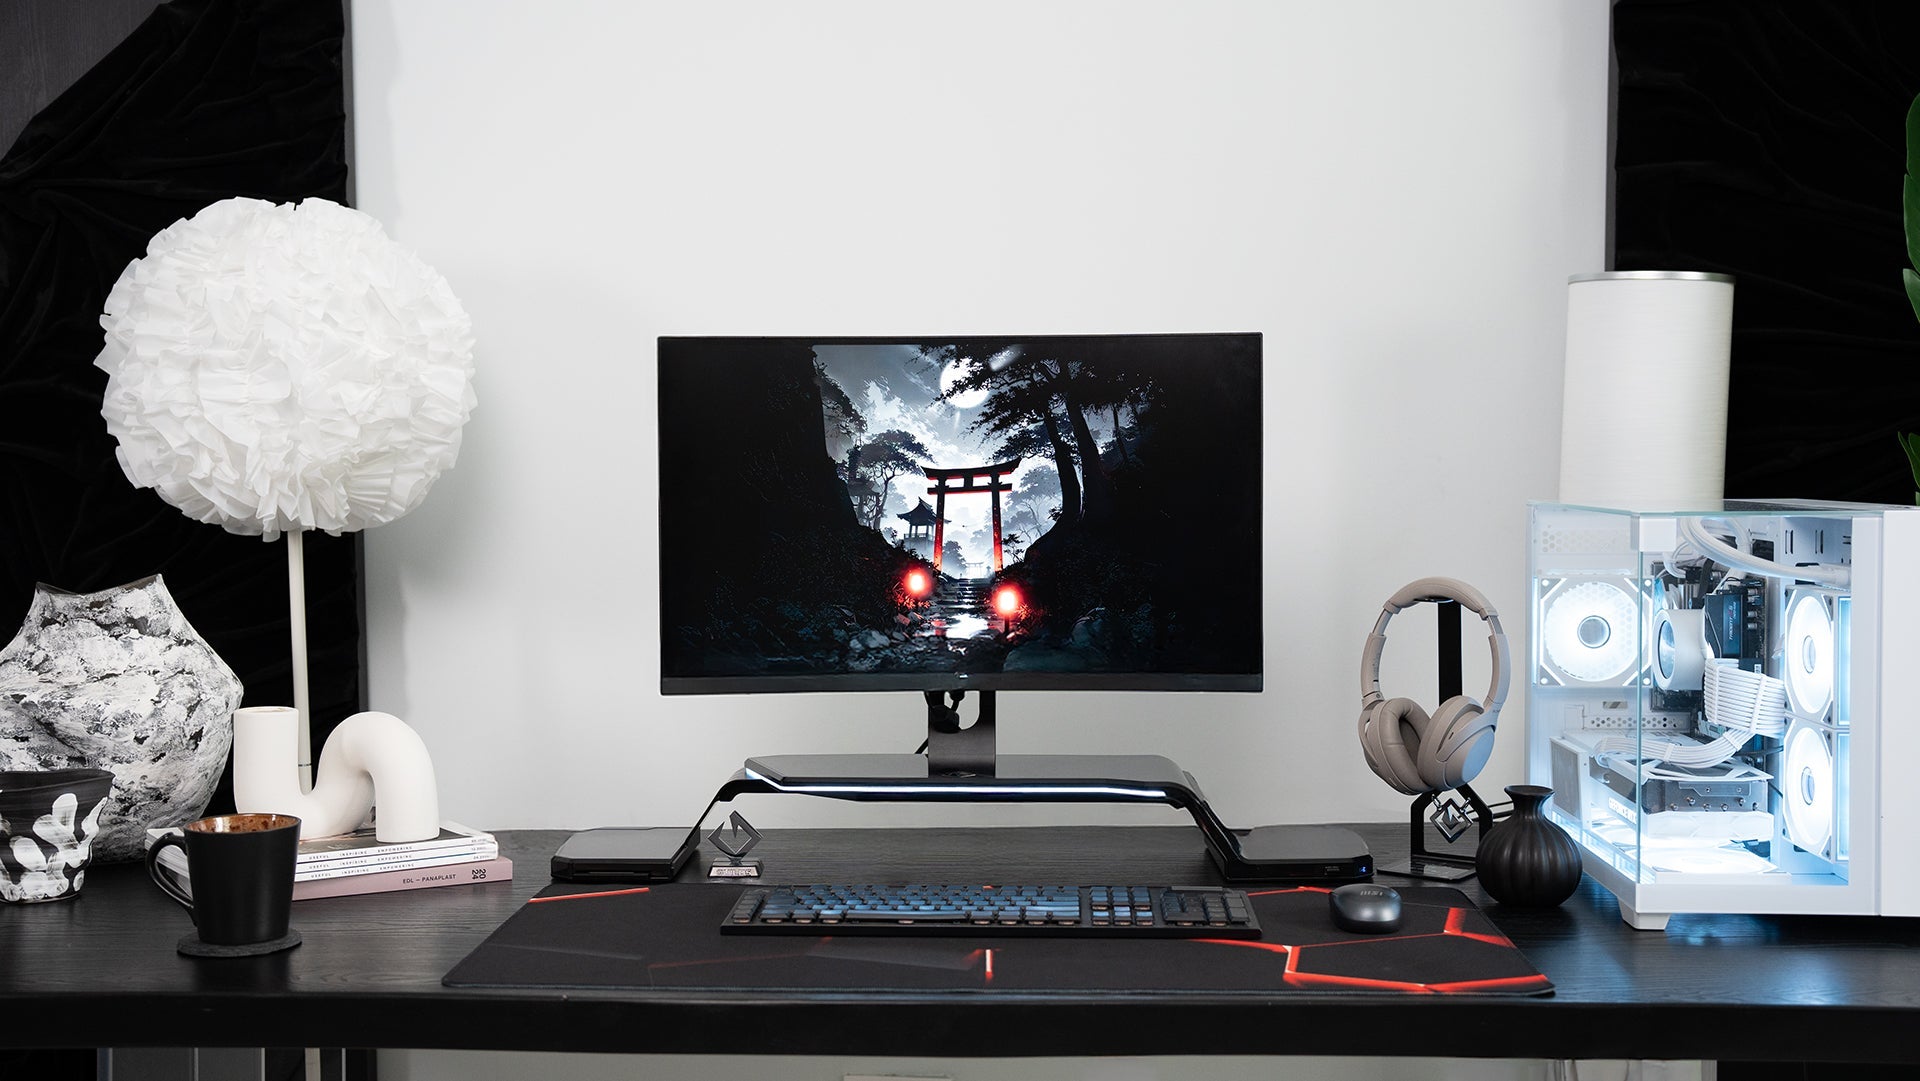
- Professional appearance. A clean setup with a mounted display looks organised. Impressive. Like you actually care about your space. Gamers love it for the clean aesthetic. Remote workers appreciate looking professional on video calls. Content creators use it for better on-camera presence.
- Future-proof. Buy a new monitor in five years. Your VESA arm still works. No waste. No need to replace working equipment. Just swap displays.
Common VESA Mount Problems And Solutions
Most installations go smoothly. Sometimes issues appear. Here is how to fix them.
- Holes do not align. You measured wrong. Get your ruler out again. Double-check the VESA pattern. You might have a 75x75 monitor and a 100x100 mount. They do not work together. You need an adapter.
- Screws are too long. They poke through the inside of your monitor. This damages electronics. Solution: get shorter screws. Measure carefully next time.
- Monitor sags. Weight exceeds the mount's capacity. Or the mount is old and springs have weakened. Check the weight capacity. If your monitor is too heavy, buy a stronger mount. If the mount is old, tighten adjustment screws or buy a new mount.
- Mount will not hold still. Friction is not tight enough. Tighten the friction adjustment screws on your mount. Turn them little by little until the monitor holds position without drifting.
- Something wiggles. Could be a screw that came loose. Check all four VESA screws. Tighten as needed. Could also be the mounting hardware at the arm or bracket. Tighten those too.
- Cable management is a mess. Route cables through the mount's cable clips or channels. Use zip ties to bundle wires. This solves the problem and looks neater.
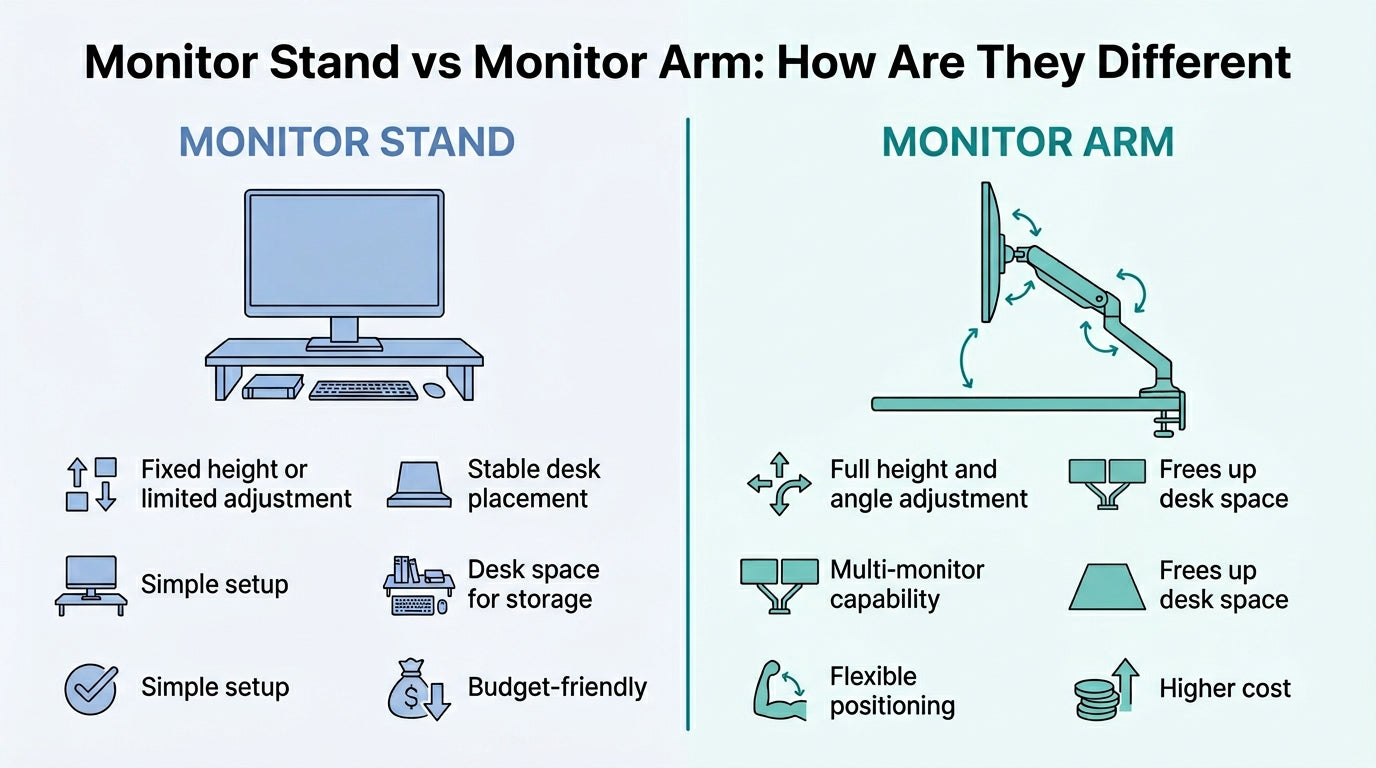
VESA Mount Vs Other Mounting Methods
VESA is not the only way to mount displays. But it is the best way for most people.
- Proprietary mounts. Some manufacturers create their own mounting systems. Only compatible with their products. If you want a different monitor, you need a different mount. Inflexible. Outdated. Avoid these.
- Clamp-style mounts. Some cheap displays use friction clamps instead of VESA holes. They grip the monitor frame directly. Works but not ideal. Leaves marks. Hard to remove without damage. Inferior solution.
- Adhesive mounting. Stick-on brackets for walls. Usually weak. Not recommended for valuable displays. Sticks to paint instead of proper anchors.
- VESA is superior because it is standardised. Any monitor works with any VESA-compatible mount. You have choices. Competition keeps prices reasonable. Quality improves. Your investment protects itself because equipment remains useful even when upgraded.
Frequently Asked Questions
What does VESA mount stand for and mean
VESA is the Video Electronics Standards Association. They created the standard for monitor mounting holes. VESA mount refers to displays that follow this standard. Four holes. Standardised spacing. Standardised thread sizes. That is what it means.
How do I know what VESA mount size my monitor uses
Check your manual. Look on the manufacturer's website. Or measure it yourself. Get a ruler. Measure the distance between mounting holes. Centre to centre. That number is your VESA size.
Are all monitor arms compatible with VESA mount
Almost all modern monitor arms are VESA-compatible. The universal 100x100mm pattern works with most displays. If you have a different pattern (75x75mm or 200x200mm), adapters exist. Rare older arms use proprietary systems. Avoid those.
What screws do I need for VESA mount installation
Check your monitor's manual for the exact specification. Usually M4 or M6 screws. Length is typically 8-10mm. Go to an electronics shop and give them these details. They will have the right parts. Cost is minimal.
Can I add VESA mount to a monitor that does not have it
Depends on the monitor design. If there is solid material on the back (not just plastic covering electronics), you might drill holes and add VESA. But this risks damaging the display. Better solution: buy an adapter bracket designed for non-VESA monitors. Safer and easier.
What is the difference between VESA 75 and VESA 100
The number is the distance between mounting holes in millimetres. VESA 75 holes are 75mm apart. VESA 100 holes are 100mm apart. They are not interchangeable. A 75x75 monitor does not fit a 100x100 arm without an adapter.
Is VESA mount safe for heavy monitors?
Yes, if you use the right mount. Check the weight capacity. Your monitor should be lighter than the maximum rating. Always. Pick a mount rated higher than your display's actual weight. With proper specifications, VESA mounting is completely safe.
Conclusion
VESA mount is the universal standard that connects displays to arms, brackets, and mounting solutions worldwide. Four holes. Same spacing. Same threads. This simple idea gives you endless flexibility. Change your monitor. Keep your arm. Move between desks. Upgrade your setup. Everything works together.
Understanding VESA patterns, weight capacity, and installation procedures makes purchasing decisions easy and confident. You know what fits your monitor. You know what is safe. You know what to expect.
At Guilds, we design products that respect the VESA standard. Our Altura Stand VESA Edition holds monitors from 21-32 inches. It mounts via VESA holes using standard hardware. It works with your existing monitor. No compatibility questions. No surprises.
We also add features beyond simple mounting. USB connectivity. RGB lighting. Storage space. Cable management. All built into one solution. Visit our homepage to explore how Guilds transforms your workspace.
Ready to upgrade your setup? Contact our team with any questions about VESA compatibility or mounting solutions. We help you build the workspace you deserve.
Leave a comment
This site is protected by hCaptcha and the hCaptcha Privacy Policy and Terms of Service apply.